Andy Heydon

Category: iOS

Infinitely scrolling tables

One of the reasons I started my latest app, MealSchedule, was because I don’t care for presenting dates in blocks such as a week or a month. I don’t like that as you reach the end of the block a large proportion of the screen contains irrelevant historical data and I don’t like that it is cumbersome to compare items on either side of the block’s boundary. Time is continuous, therefore its display should be unbroken. Just because a week is nice and convenient for having one of each kind of day, you ignore that not every-one’s week starts on a Monday or a Sunday.

To translation a continuous time display to an app, you really need to use a vertical scroll as this is by far the most natural method for presenting an infinite amount of data. So the first challenge for my new app was to develop a way to handle and present an unlimited scrolling of dates.

The simplest option, of course, is to use a UITableView and return a very large number of rows. You can use scrollToRowAtIndexPath: to position today as the initial row, somewhere in the middle of the table. This works fairly well and is very easy to implement provided, and this is a big constraint, that each row is always the same height, indeed you do not want to implement tableView:heightForRowAtIndexPath: at all. iOS needs the height of each row to calculate the offsets of each cell within the scroll view of a table. When you call scrollToRowAtIndexPath: for example, iOS must determine the height of each preceding row, if that height is variable then the costs of calculating the offsets become untenable as soon as the table has more than a couple of hundred rows. With a fixed height, iOS will simply do the math to calculate the offset for a particular row.

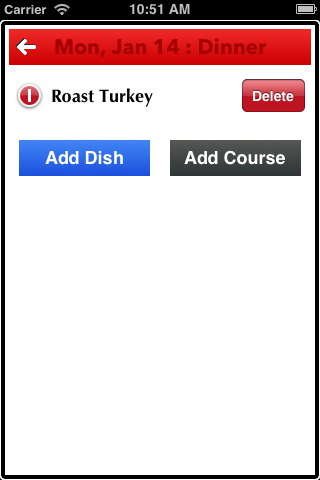
But MealSchedule was going to have variable height content, so the simplest solution is off the table (pun intended!) But maybe we could be smarter and use a smaller number of rows as a window on to the underlying set of dates? Every time the user scrolls I could just change the dates that the visible rows represent.

A UITableView is a subclass of UIScrollView, so by implementing scrollViewDidEndDecelerating: and scrollViewDidEndDragging:willDecelerate: from the UITableView delegate – a table’s delegate serves up all of the UIScrollViewDelegate methods, I can use a quick sleight of hand to update the dates for the visible rows and reload the table. You have to implement both methods because either will be called depending on how the user scrolls. This pattern is a huge improvement over the first option, but suffers from a jerky appearance because with only a certain number of rows in the table there is an end point of the scrolling and there is a delay before I can update them.

While this second option was better there is still too much lag because of UITableView overhead in calculating row size. So the third approach is to strip out the overhead. UITableView is a complex class that takes care of a lot of situations, but I didn’t necessarily need all of that. What if I just had a UIScrollView and used by own UIViews to represent each day?

This proves to be a great solution. I could quickly add and remove subviews from the start and end of the content when the UIScrollView was scrolled and I could have variable height rows because I could control the number of times each row had to be recalculated. layoutSubviews is called every time a UIScrollView is scrolled, so I can quickly check to see if we are close to one end or the other, and if we are, remove the day subview from the opposite end, add in a new day and simply adjust the origins of the remaining subviews.

I choose to have a few extra days on either end of the visible set to allow for smoother scrolling. There is a function in the app to move to another date, and if that date is within the current set I can perform a nice animated scroll. But if the date is outside of the range, then I have to recalculate the entire set and there is no animated scroll. Most date changes are going to be by a week, so that is how many extra days I have available, just in case.

Here is the code in my UIScrollView subclass that handles the day subview creation and the scrolling (I have removed parts that are not relevant to this discussion.). The day subview is a UIView subclass called MealsDateView, the details of which are also irrelevant.

@interface MealPlanScrollView () {
NSMutableArray *_dayViews;
NSInteger _numberOfDays;
NSInteger _viewFirstDateNum;
NSInteger _viewLastDateNum;
NSInteger _todayDateNum;
NSInteger _maxNumberOfDays;
}
- (void)buildDayViews;
- (MealsDateView *)insertDayAtIndex:(NSInteger)index;
- (CGFloat)deleteDay:(MealsDateView *)day;
- (void)adjustDayOriginsBy:(CGFloat)distance startingAt:(NSInteger)start;
- (MealsDateView *)findViewForDateNum:(NSInteger)dateNum;
- (void)setTodayRow;
@end
@implementation MealPlanScrollView
- (id)initWithFrame:(CGRect)frame {
self = [super initWithFrame:frame];
if (self) {
// Base the number of days on the device size
// use a week either side to allow for smooth scrolling when moving by 7 days
_numberOfDays = roundf([UIScreen portraitHeight] / DEFAULT_ROW_HEIGHT) + 14;
_maxNumberOfDays = [NSDate maxNumberOfDates];
[self setContentSize:CGSizeMake(CGRectGetWidth(frame), 0)];
[self setDelegate:self];
[self setTodayRow];
_viewFirstDateNum = _todayDateNum - _numberOfDays/2;
_viewLastDateNum = _todayDateNum + _numberOfDays/2;
// Build the day views
_dayViews = [[NSMutableArray alloc] init];
[self buildDayViews];
[self setYear];
MealsDateView *firstVisible = _dayViews[(_numberOfDays/2)-1];
[self setContentOffset:CGPointMake(0, CGRectGetMinY([firstVisible frame]))];
}
return self;
}
- (void)layoutSubviews {
[super layoutSubviews];
// Adjust the scroll offset if gone too far one way or the other
CGPoint currentOffset = [self contentOffset];
currentOffset.x = 0;
CGFloat contentHeight = [self contentSize].height;
CGFloat centerOffsetY = (contentHeight - CGRectGetHeight([self bounds])) / 2.0f;
CGFloat distanceFromCenter = currentOffset.y - centerOffsetY;
CGFloat buffer = DEFAULT_ROW_HEIGHT;
if (fabs(distanceFromCenter) > buffer) {
if (distanceFromCenter < 0) {
// move from bottom to top
while (fabs(distanceFromCenter) > buffer) {
if (_viewFirstDateNum == 0) {
break;
}
_viewFirstDateNum--;
_viewLastDateNum--;
[self deleteDay:[_dayViews lastObject]];
MealsDateView *firstDay = [self insertDayAtIndex:0];
CGFloat h = CGRectGetHeight([firstDay frame]);
currentOffset.y += h;
[self adjustDayOriginsBy:h startingAt:1];
distanceFromCenter += h;
if (distanceFromCenter >= 0) {
break;
}
}
} else {
// move from top to bottom
while (distanceFromCenter > buffer) {
if ((_viewLastDateNum-1) == _maxNumberOfDays) {
break;
}
_viewFirstDateNum++;
_viewLastDateNum++;
CGFloat h = [self deleteDay:_dayViews[0]];
[self insertDayAtIndex:[_dayViews count]];
[self adjustDayOriginsBy:-1*h startingAt:0];
currentOffset.y -= h;
distanceFromCenter -= h;
if (distanceFromCenter <= 0) {
break;
}
}
}
}
[self setContentOffset:currentOffset];
}
#pragma mark - Public
- (void)changeRowHeightOfDate:(NSDate *)date by:(CGFloat)delta {
NSInteger dateNum = [date daysSinceStart];
MealsDateView *day = [self findViewForDateNum:dateNum];
if (!day) {
return;
}
CGFloat oldHeight = CGRectGetHeight([day frame]);
// Adjust the size of the views
CGFloat newHeight = oldHeight + delta;
if (newHeight != oldHeight) {
CGFloat diff = newHeight - oldHeight;
CGSize s = [self contentSize];
s.height += diff;
[self setContentSize:s];
[self adjustDayOriginsBy:diff startingAt:(dateNum-_viewFirstDateNum+1)];
}
}
- (void)layoutMeals {
CGRect f = [self frame];
f.size.width = [UIScreen width];
f.size.height = [UIScreen height]-[UIScreen statusBarHeight]-f.origin.y;
[self setFrame:f];
CGFloat y = 0;
for (MealsDateView *day in _dayViews) {
CGRect df = [day frame];
if (CGRectGetMinX(df) != y) {
df.origin.y = y;
[day setFrame:df];
}
[day layoutMeals];
y += CGRectGetHeight([day frame]);
}
CGSize s = [self contentSize];
s.height = y;
[self setContentSize:s];
}
#pragma mark - Meal actions
- (void)scrollToDate:(NSDate *)date inRect:(CGRect)rect {
BOOL reload = NO;
NSInteger newDateNum = [date daysSinceStart];
if ((newDateNum <= _viewFirstDateNum) || (newDateNum >= _viewLastDateNum)) {
_viewFirstDateNum = newDateNum - _numberOfDays/2;
_viewLastDateNum = newDateNum + _numberOfDays/2;
if (_viewFirstDateNum < 0) {
_viewFirstDateNum = 0;
_viewLastDateNum = _viewFirstDateNum + _numberOfDays;
}
if (_viewLastDateNum > [NSDate maxNumberOfDates]) {
_viewLastDateNum = [NSDate maxNumberOfDates];
_viewFirstDateNum = _viewLastDateNum - _numberOfDays;
}
reload = YES;
}
if (reload) {
[self buildDayViews];
}
NSInteger newRow = newDateNum - _viewFirstDateNum;
if (newRow < 0) {
newRow = 0;
}
if (newRow >= [_dayViews count]) {
newRow = [_dayViews count] - 1;
}
MealsDateView *day = _dayViews[newRow];
CGRect f = [self frame];
CGRect df = [day frame];
CGPoint offset = [self contentOffset];
// rect is relative to the screen
offset.y = df.origin.y - (rect.origin.y - f.origin.y);
if (offset.y < 0) {
offset.y = 0;
}
[CATransaction begin];
[self setContentOffset:offset animated:!reload];
[CATransaction commit];
}
- (void)scrollByDistance:(CGFloat)distance {
CGPoint offset = [self contentOffset];
offset.y -= distance;
[UIView animateWithDuration:IOS_ANIMATION_DURATION
delay:0.0f
options:IOS_ANIMATION_CURVE
animations:^{
[self setContentOffset:offset animated:NO];
}
completion:^(BOOL finished) {
if (finished) {
}
}];
}
#pragma mark - Local
- (void)buildDayViews {
for (MealsDateView *day in _dayViews) {
[day removeFromSuperview];
}
[_dayViews removeAllObjects];
CGSize s = [self contentSize];
s.height = 0;
[self setContentSize:s];
for (int i=0; i<_numberOfDays; i++) {
[self insertDayAtIndex:i];
}
}
- (MealsDateView *)insertDayAtIndex:(NSInteger)index {
NSInteger dayNum = (_viewFirstDateNum + index);
NSDate *thisDate = [NSDate dateSinceStartForDayNumber:dayNum];
CGFloat y = 0;
if (index > 0) {
UIView *prevDay = _dayViews[(index-1)];
y = CGRectGetMaxY([prevDay frame]);
}
DateRowType rowType = DateRowTypeMiddle;
if (dayNum == 0) {
rowType = DateRowTypeFirst;
} else if (dayNum == _maxNumberOfDays) {
rowType = DateRowTypeLast;
}
MealsDateView *day = [[MealsDateView alloc] initWithDate:thisDate rowType:rowType];
CGRect f = [day frame];
f.origin.y = y;
[day setFrame:f];
[_dayViews insertObject:day atIndex:index];
[self insertSubview:day atIndex:0];
CGSize s = [self contentSize];
s.height += CGRectGetHeight([day frame]);
[self setContentSize:s];
return day;
}
- (CGFloat)deleteDay:(MealsDateView *)day {
CGRect f = [day frame];
CGSize s = [self contentSize];
s.height -= CGRectGetHeight(f);
[self setContentSize:s];
[day removeFromSuperview];
[_dayViews removeObject:day];
return CGRectGetHeight(f);
}
- (void)adjustDayOriginsBy:(CGFloat)distance startingAt:(NSInteger)start {
for (int i=start; i<[_dayViews count]; i++) {
MealsDateView *day = (MealsDateView *)_dayViews[i];
CGRect f = [day frame];
f.origin.y += distance;
[day setFrame:f];
}
}
- (MealsDateView *)findViewForDateNum:(NSInteger)dateNum {
if ((dateNum < _viewFirstDateNum) || (dateNum > _viewLastDateNum)) {
return nil;
}
NSInteger index = dateNum - _viewFirstDateNum;
if ((index >= 0) && (index < [_dayViews count])) {
return _dayViews[index];
} else {
return nil;
}
}
#pragma mark - Date/time methods
- (void)setTodayRow {
_todayDateNum = [[NSDate today] daysSinceStart];
}
view raw gistfile1.m hosted with ❤ by GitHub

I have a category to extend NSDate which provides methods to convert between a full date and an integer as it is easier to work with a simple scalar in managing the set of days.

Advertisement

Upgrading the delete confirmation button

Standard delete confirmationiOS has a nice pattern for deleting a row in a table, either tap a minus symbol in a red circle or swipe your finger along the row and a delete button slides in from the right, tap the button to confirm the action or tap elsewhere to cancel. The only problem is that if you have a different look and style than the default then the delete button looks out of place.

I encountered this recently and decided to see if I could replace the delete button with one more in keeping with the rest of the graphic style in my MealSchedule app.

Searching for examples of what other people might have done led to a couple of general approaches. The first was to subclass UITableViewCell to get the ability to override the willTransitionToState: method that is invoked as a cell moves through various editing states, and the second was to walk through the view hierarchy of the newly animated delete button and modify it. There’s nothing wrong with first suggestion because it utilizes a standard API, but the second involves testing against internal class names and assuming a particular view hierarchy, neither of which have any place in any app, regardless of whether you are submitting it to the AppStore or not. Working against an API or utilizing ordinarily hidden features is a bad smell and a strong indication that you are doing something wrong.

So the first step to having a nice delete confirmation button is to subclass UITableViewCell and override willTransitionToState:. The method is called with a bit mask of the new states. We are interested in the situation where the delete confirmation button is about to be displayed.

- (void)willTransitionToState:(UITableViewCellStateMask)state {
if ((state & UITableViewCellStateShowingDeleteConfirmationMask) == UITableViewCellStateShowingDeleteConfirmationMask) {
} else {
[super willTransitionToState:state];
}
}
view raw gistfile1.m hosted with ❤ by GitHub

The default transition will create the shiny delete button and animate it into place. We don’t want to do that because we want to create our own button, but we will leave the other transitions to their default for the time being, so we are careful as to when we invoke super.

The next step is to create the new button and animate it into place. MealSchedule has a UIButton subclass named MPButton that encapsulates my alternative presentation, so let’s extend the transition to include that.

- (void)willTransitionToState:(UITableViewCellStateMask)state {
CGRect f;
if ((state & UITableViewCellStateShowingDeleteConfirmationMask) == UITableViewCellStateShowingDeleteConfirmationMask) {
if (!_deleteButton) {
_deleteButton = [MPButton buttonWithType:MPButtonTypeAlert withTitle:NSLocalizedString(@"Delete",@"Delete")];
[[_deleteButton titleLabel] setFont:[[UIFont buttonFont] changeFontSizeBy:-2]];
[_deleteButton addTarget:self action:@selector(delete:) forControlEvents:UIControlEventTouchUpInside];
[self addSubview:_deleteButton];
}
f = RBRectCenterPositionY([_deleteButton frame], CGRectGetHeight([self frame]));
f.origin.x = CGRectGetWidth([self frame]);
[_deleteButton setFrame:f];
f.origin.x = CGRectGetMaxX([self frame]) - [UIScreen tableContentPadding] - f.size.width;
_isDeleting = NO;
} else {
[super willTransitionToState:state];
if (_deleteButton) {
f = [_deleteButton frame];
if (_isDeleting) {
alpha = 0.0f;
} else {
f.origin.x = CGRectGetWidth([self frame]);
}
}
}
if (_deleteButton) {
[UIView animateWithDuration:0.3f
animations:^{
[_deleteButton setFrame:f];
[_deleteButton setAlpha:alpha];
}];
}
}
view raw gistfile1.m hosted with ❤ by GitHub

I use an instance variable to hold a reference to the delete button. I don’t strictly need to do this – I could use a tag and viewWithTag: instead, but the default implementation of the delete confirmation button uses tags within its hierarchy and so keeping a reference is safer than a tag by avoiding any unintended side effects from the base classes looking for views. The RBRectCenterPositionY is a simple function I use to center a CGRect within a particular height. I also use a category on UIScreen to return various numbers, such as the standard 10 pixels that are added as padding to a table’s content.

Note that when the cell transitions out of the delete confirmation state we want to make sure the delete button is moved out of the way, though if the cell is being deleted (as flagged by the _isDeleting variable) when just fade the button to invisible rather than move it to the right. This works as a smoother effect during the actual delete, which we will see in a minute, but for now you can tap the red minus to animate the delete button in, and tap it again to animate the button away.

The button is worthless unless we can actually perform a delete so we need to provide a method for the action we specified in the button creation.

- (void)delete:(id)sender {
_isDeleting = YES;
[self commitEdit:UITableViewCellEditingStyleDelete];
}
- (void)commitEdit:(UITableViewCellEditingStyle)editStyle {
[self willTransitionToState:UITableViewCellStateShowingEditControlMask];
if ([[_table dataSource] respondsToSelector:@selector(tableView:commitEditingStyle:forRowAtIndexPath:)]) {
NSIndexPath *ip = [_table indexPathForRowAtPoint:[self center]];
[[_table dataSource] tableView:_table commitEditingStyle:editStyle forRowAtIndexPath:ip];
}
[self didTransitionToState:UITableViewCellStateShowingEditControlMask];
}
view raw gistfile1.m hosted with ❤ by GitHub

When the delete button is tapped, it will invoke the delete: method that in turn invokes another local method named commitEdit:. As my button is a complete replacement for the standard button then we need to invoke the same transitions that would normally occur. In this particular situation, my table is always in edit mode so we will always be transitioning back to the UITableViewCellStateShowingEditControlMask state.

The table’s datasource is the class that handles the delete so we need to invoke the standard tableView:commitEditingStyle:forRowAtIndexPath: method. The only slight problem here is that we need to know our current index path, and that is not available to us from the perspective of our UITableViewCell world. Unfortunately neither is the knowledge of the containing table. The table is actually a piece of private information in the base UITableViewCell class, but is not exposed to subclasses. Therefore we need to create a property, named table here, to pass in the table reference when we create an instance of our cell. Note that you cannot call this property tableView because that will conflict with the private reference!

The final step is to handle the cancelation of the delete by tapping elsewhere in the table. The easiest way of doing that is to set up a UITapGestureRecognizer on the table.

- (void)willTransitionToState:(UITableViewCellStateMask)state {
if ((state & UITableViewCellStateShowingDeleteConfirmationMask) == UITableViewCellStateShowingDeleteConfirmationMask) {
// ...
_showingConfirmation = YES;
_cancelDeleteGesture = [[UITapGestureRecognizer alloc] initWithTarget:self action:@selector(deleteConfirmation:)];
[_table addGestureRecognizer:_cancelDeleteGesture];
} else {
// ...
}
// ...
}
- (void)didTransitionToState:(UITableViewCellStateMask)state {
if (_showingConfirmation) {
if ((state & UITableViewCellStateShowingDeleteConfirmationMask) != UITableViewCellStateShowingDeleteConfirmationMask) {
_showingConfirmation = NO;
if (_cancelDeleteGesture) {
[_table removeGestureRecognizer:_cancelDeleteGesture];
_cancelDeleteGesture = nil;
}
}
}
[super didTransitionToState:state];
}
// In iOS5 the tap gesture is fired before the touch on the delete button, even though the highlight happens
// In iOS6 the touch on the button fires before the tap gesture
- (void)deleteConfirmation:(UITapGestureRecognizer *)sender {
if ([sender state] == UIGestureRecognizerStateEnded) {
UITableViewCellEditingStyle editStyle = UITableViewCellEditingStyleNone;
// Determine if we actually tapped on the delete button
CGPoint curLocation = [sender locationInView:self];
if (CGRectContainsPoint([_deleteButton frame], curLocation)) {
_isDeleting = YES;
editStyle = UITableViewCellEditingStyleDelete;
}
[self commitEdit:editStyle];
}
}
view raw gistfile1.m hosted with ❤ by GitHub

The gesture recognizer is created when we transition into the delete confirmation state, and removed when we have transition out of the confirmation.

One small wrinkle that I discovered here was a difference between iOS5 and iOS6. In the later SDK, the tap on the delete button will override that of the tap gesture, meaning the delete: method is invoked directly, but on iOS5 (and possibly earlier but I am not targeting those platforms so I didn’t test them), the tap gesture fires and the button’s action does not. Hence the deleteConfirmation: method tests to see if the tap was actually over the delete button or not.

Custom delete confirmationNow I have a nice delete confirmation button that matches all the other buttons in the app, and has been implemented without the knowledge or use of internal classes or views. In addition to the code above, I added a couple of custom methods on my table delegate to dim the other visible controls to avoid any confusion over the delete action, but that is just a little detail in my particular implementation.

I also decided to leave the red minus as is because it doesn’t look as out of place as much as the confirmation button. The only functionality I have not replicated from the default delete confirmation process is animating the red minus back to horizontal if the delete is cancelled. To be able to perform that animation with the standard button would require referencing the internal representation. Alternatively I could replace the button, which I might do if the lack of animation starts to bug me.

Chasing down splotchy bugs

“Is it supposed to look like this?”

Those words were uttered by my wife after I had loaded the latest test version of my app on to a phone so I could demonstrate a new feature. She had wandered off into another area of the app, and as I peaked over her shoulder, I winced in fear as indeed, the screen should not look like that, but nevertheless contained big splotches of transparent pixels where the keyboard was supposed to be. She was trying to type in the name of an item of food but was struggling when half of the keys where randomly invisible.

Corrupt KeyboardThere are moments in software development when you encounter bugs so strange and bizarre that you have no explanation for their cause, that you cannot even conceive of how to achieve the effect if you were trying to on purpose. This was one of the those moments – how on earth do you, at an application level, render chunks of the keyboard to disappear, and different chunks became invisible when pressing different keys, and sometimes those chunks flashed at you, tantalizing and teasing letters?

Of course everything works perfectly on the simulator, just not on the device, and to add insult to the misery, the splotches were ghosts, as grabbing a screenshot failed to include the corruption. I had to resort to using a second camera to capture their existence.

I am on the verge of completing a new app, to be named MealSchedule, that allows you to plan out the dishes you want to eat at future meals. I envisage the app as a reminder of what I’ll be cooking that day and to guide my shopping — a future version will contain some ingredient/shopping list component. I had started the app as a proof of concept and to try out a few UI features, but I had grown to like the direction it was heading in, so I was now focused on launching to the app store. Except there were transparent areas on the screen where they shouldn’t be, and I had no explanation of why.

The main fear, of course, is that this was an internal bug, a problem in iOS that only Apple could fix, a bug which would have an indeterminate timeline and therefore your whole app is scuppered before it can even launch. I’m sure my wife could sense my nervousness as she handed the phone back to me and left me alone to stew.

So first steps, try and isolate the problem. This was the only data entry field in the app, it is UITextView (because I needed multiple lines), but it was wrapped up in a third party control. Let’s quickly rip that out and try a plain UITextView… Hmmm, that works sometimes but the holes return when I use a large font size than the default. That’s odd, feels fishy, and doesn’t make any sense. I try several other things and continue to get inconsistent results. I can’t spot any discernable pattern.

Corrupt KeyboardThe UITextView is on a child view controller that is presented from the main screen. Let’s try dropping an instance on to the main screen (ignore the aesthetics for now). Great, that works perfectly, even the HPGrowingText version. Here was a clue, but it was late, I was tired and I’d had a couple of glasses of wine, to spot it amongst the raft of commented out code and quick hacks.

The next day, refreshed and raring to go because this was a do-or-die bug, I tried a different tack. The app worked perfectly on the simulator, but I had only pushed distinct builds to the device and those earlier versions had not exhibited any corrupt keyboard problems. Therefore I could analyze all the recent changes to determine where the problem was introduced and design a workaround or fix from there, only I wasn’t that sure exactly which build was previously on the phone.

Version control for a one person shop may seem like overkill, but I had been pretty good at committing after each discrete piece of functionality (64 commits in 6 weeks), so I had some pretty good fidelity on changes. Slowly by checking out each previous version and undoing each change, I eventually hit upon the one line — notice how all really strange bugs come down to one line — that caused the corruption or not.

The problematic line?

[_popoverView setClipsToBounds:YES];

A simple instruction telling a view to not draw any content outside of its bounds. Generally something that shouldn’t cause a problem, and while this particular view is an ancestor view of the UITextView, its bounds in this particular instance, were the entire screen and the keyboard was only ever corrupted on the first two rows of letters and not at the bottom. However the one distinguishing feature about this _popoverView was that it also had a shadow. Commenting out the shadow and leaving the clipping in, and the corruption did not appear. The shadow was important, and _popoverView had a subview that I could easily apply the clipping to, all the angst and fear could be addressed in a simple one line change.

So the morals of this story are:

  • Use version control and commit often, even if it is a personal project
  • Test on the device as often as possible, if for no other reason that you have some history. I had, potentially, about a week’s worth of changes to go through since I had last installed on the device
  • Don’t clip a view that has a shadow!

iOS6 rotation addendum

I wrote previously about handling rotation in iOS6, notably with respect to modal dialogs which I determined are best handled as child view controllers. I recently extended the app that brought to light a situation I wasn’t handling and therefore I need to add an addendum to that post.

The new feature I added was a full screen modal that I did not want to be rotated on the iPhone. The layout was primarily data entry and hence a keyboard would over a significant portion of the screen, so the flow really dictated a portrait only display. I had to tweak the code to prohibit the rotation on this particular view controller.

A very quick reading of the documentation would suggest that adding the following code to the modal view controller would do the job.

- (BOOL)shouldAutorotate {
return IPAD ? YES : NO;
}
- (NSUInteger)supportedInterfaceOrientations {
return IPAD ? UIInterfaceOrientationMaskAll : UIInterfaceOrientationMaskPortrait;
}
view raw gistfile1.m hosted with ❤ by GitHub

We are saying that this view only supports portrait on the iPhone and that we should not auto-rotate. However this does not work as expected, because under iOS6 container view controllers (such as UINavigationController) do not consult their children about rotation events. The root view controller application in my app is a UINavigationController and so the determination as to rotate or not does not go deeper into the view hierarchy and therefore the autoRotate and supportInterfaceOrientations methods on my modal view controller are never called. I am using a base UINavigationController so the rotation methods fall back to their defaults, which on the iPhone is to allow everything except upside down portrait.

The first step is to force the UINavigationController consult its top level view controller about rotation, which is easily managed by a category:

@implementation UINavigationController (Rotation)
// iOS 6
- (BOOL)shouldAutorotate {
return [[self topViewController] shouldAutorotate];
}
- (NSUInteger)supportedInterfaceOrientations {
return [[self topViewController] supportedInterfaceOrientations];
}
@end
view raw gistfile1.m hosted with ❤ by GitHub

My top level view controller is also a container that presents modals as child view controllers, so it needs to consult its children too.

- (BOOL)shouldAutorotate {
BOOL autoRotate = YES;
for (UIViewController *vc in [self childViewControllers]) {
autoRotate = autoRotate && [vc shouldAutorotate];
}
return autoRotate;
}
- (NSUInteger)supportedInterfaceOrientations {
NSUInteger supported = IPAD ? UIInterfaceOrientationMaskAll : UIInterfaceOrientationMaskAllButUpsideDown;
for (UIViewController *vc in [self childViewControllers]) {
supported &= [vc supportedInterfaceOrientations];
}
return supported;
}
view raw gistfile1.m hosted with ❤ by GitHub

So finally this code will ask the modal view controller about rotation and will receive an appropriate answer. This new modal will prohibit rotation, but other simpler and smaller modals still can be rotated.

App Tour : Part 4: Mimicking instance variables for a category

This is the final part of a four part series. The first part discussed dynamically injecting video into a UIWebView and followed on in the second part with how to detect scrolling to the end of the HTML page. The third part covered how to handle full screen video on an iPad.

The previous post in this series discussed how to handle full screen video when that video is launched from a popover on the iPad. A popover is not a standard part of the view hierarchy, so when the video is made full screen the popover remains on top of the video, which of course is not a desired effect. The solution is to recognize when the video enters full screen and hide the popover temporarily and restore it when the video exits.

In my application there are currently two different view controllers that present a popover with the potential to show video. Therefore I wanted to wrap the hide and show effects into a nice neat code unit that I could reuse whenever necessary. In Objective-C that usually means a category. I could encapsulate the new hidePopover: and showPopover: methods in a UIViewController category and import that wherever it was required.

Hiding any old popover is easy, but what I wanted to do was to restore the popover to the exact same state as when it was hidden. As my popover contained a UINavigationController and several UITableViewControllers, I needed to return to a view stack several layers deep. The easiest way to do this is to retain a reference to the popover’s content before dismissing it and using that reference when the popover is recreated.

// Temporarily hide a popover
- (void)hidePopover:(NSNotification *)notification {
self.hiddenPopoverContent = nil;
if (self.hiddenPopoverController) {
// Save some details of the current state
// Holding on to the content view means we can go back to the same state
self.hiddenPopoverContent = [self.hiddenPopoverController contentViewController];
self.hiddenPopoverContentSize = [self.hiddenPopoverController popoverContentSize];
id <UIPopoverControllerDelegate> popoverDelegate = [self.hiddenPopoverController delegate];
self.hiddenPopoverDelegate = popoverDelegate;
[self.hiddenPopoverController dismissPopoverAnimated:YES];
self.hiddenPopoverHidingInProgress = YES;
if (popoverDelegate) {
[popoverDelegate popoverControllerDidDismissPopover:self.hiddenPopoverController];
}
self.hiddenPopoverHidingInProgress = NO;
self.hiddenPopoverController = nil;
}
}
// Show a popover that had previously been hidden
- (void)showPopover:(NSNotification *)notification {
if (self.hiddenPopoverContent) {
UIPopoverController *popover = [[UIPopoverController alloc] initWithContentViewController:self.hiddenPopoverContent];
if ([popover respondsToSelector:@selector(popoverBackgroundViewClass)]) {
[popover setPopoverBackgroundViewClass:[ZingPopoverBackgroundView class]];
}
CGSize popSize = self.hiddenPopoverContentSize;
[popover setPopoverContentSize:popSize animated:YES];
[popover setDelegate:self.hiddenPopoverDelegate];
if (self.hiddenPopoverPresentingButton) {
[popover presentPopoverFromBarButtonItem:self.hiddenPopoverPresentingButton permittedArrowDirections:self.hiddenPopoverArrowDirection animated:self.hiddenPopoverAnimated];
} else {
[popover presentPopoverFromRect:self.hiddenPopoverPresentingRect inView:[self view] permittedArrowDirections:self.hiddenPopoverArrowDirection animated:self.hiddenPopoverAnimated];
}
self.hiddenPopoverController = popover;
}
}
view raw gistfile1.m hosted with ❤ by GitHub

The hidePopover: grabs the popover’s contentViewController before dismissal so that the content is not released, and when showPopover: recreates the popover, it reuses this content. Because the category retains the contentViewController, it’s state is left untouched and the user is returned to the same place in the navigation hierarchy.

Note that hidePopover: also retains information about the size and placement of the popover. Once we have this information then the category does not have to go back to the hosting view controller and ask it to re-present the popover again. As far as the hosting view controller is concerned. nothing has happened.

But the fly in the ointment here, is that categories cannot define new ivars, only methods. So how do we store new information just for the category, without having to extend the main view controller? If we have to modify the base class then that destroys the drop-in effect of the category.

Well, this is were we can drop down and exploit the Objective-C run-time.

With iOS 4.0, Apple introduced associated objects to the Objective-C run-time, providing a mechanism to link two objects together in an ad-hoc manner, without the need to explicitly declare variables. Effectively an object maintains a dictionary to a set of arbitrary objects.

The two main associated object functions are:

#import 

void objc_setAssociatedObject(id object, void *key, id value, objc_AssociationPolicy policy)
id objc_getAssociatedObject(id object, void *key)

The association policy is similar to the standard semantic – OBJC_ASSOCIATION_ASSIGN, OBJC_ASSOCIATION_RETAIN_NONATOMIC, OBJC_ASSOCIATION_COPY_NONATOMIC, OBJC_ASSOCIATION_RETAIN, OBJC_ASSOCIATION_COPY. Therefore an object can retain a reference to another object.

So let’s see how we can wrap this into a neat package for our category.

First we’ll declare a set of private properties and keys for our associations:

static char const * const HiddenPopoverControllerKey = "HiddenPopoverController";
static char const * const HiddenPopoverContentKey = "HiddenPopoverContent";
static char const * const HiddenPopoverDelegateKey = "HiddenPopoverDelegate";
static char const * const HiddenPopoverPresentingRectKey = "HiddenPopoverPresentingRect";
static char const * const HiddenPopoverPresentingButtonKey = "HiddenPopoverPresentingButton";
static char const * const HiddenPopoverArrowDirectionKey = "HiddenPopoverArrowDirection";
static char const * const HiddenPopoverAnimatedKey = "HiddenPopoverAnimated";
static char const * const HiddenPopoverContentSizeKey = "HiddenPopoverContentSize";
static char const * const HiddenPopoverHidingInProgessKey = "HiddenPopoverHidingInProgress";
@interface UIViewController (RBPopoverPrivate)
@property (nonatomic) UIPopoverController *hiddenPopoverController;
@property (nonatomic) UIViewController *hiddenPopoverContent;
@property (nonatomic) id <UIPopoverControllerDelegate> hiddenPopoverDelegate;
@property (nonatomic) CGRect hiddenPopoverPresentingRect;
@property (nonatomic) UIBarButtonItem *hiddenPopoverPresentingButton;
@property (nonatomic) UIPopoverArrowDirection hiddenPopoverArrowDirection;
@property (nonatomic) BOOL hiddenPopoverAnimated;
@property (nonatomic) CGSize hiddenPopoverContentSize;
@property (nonatomic) BOOL hiddenPopoverHidingInProgress;
@end
view raw gistfile1.m hosted with ❤ by GitHub

The properties allow an easy interface to the data in the other methods in the category, e.g. self.hiddenPopoverController and self.hiddenPopoverContent.

In the implementation, we provide our own accessor functions that fetch and store the data as associated objects, with a retain policy, to the base object.

@implementation UIViewController (RBPopoverPrivate)
- (UIPopoverController *)hiddenPopoverController {
return objc_getAssociatedObject(self, HiddenPopoverControllerKey);
}
- (void)setHiddenPopoverController:(UIPopoverController *)hiddenPopoverController {
objc_setAssociatedObject(self, HiddenPopoverControllerKey, hiddenPopoverController, OBJC_ASSOCIATION_RETAIN_NONATOMIC);
}
- (UIViewController *)hiddenPopoverContent {
return objc_getAssociatedObject(self, HiddenPopoverContentKey);
}
- (void)setHiddenPopoverContent:(UIViewController *)hiddenPopoverContent {
objc_setAssociatedObject(self, HiddenPopoverContentKey, hiddenPopoverContent, OBJC_ASSOCIATION_RETAIN_NONATOMIC);
}
// plus many more ...
@end
view raw gistfile1.m hosted with ❤ by GitHub

Note, assigning nil to an associated object will release it and remove the association.

Now we have the basics for our category to handle the presentation of a popover when there is a chance that we might need to temporarily hide it due to full screen video.

Here is the full code for the category.

@implementation UIViewController (RBPopover)
- (void)startTrackingHidePopover {
[[NSNotificationCenter defaultCenter] addObserver:self
selector:@selector(hidePopover:)
name:NOTIFICATION_POPOVER_HIDE
object:nil];
[[NSNotificationCenter defaultCenter] addObserver:self
selector:@selector(showPopover:)
name:NOTIFICATION_POPOVER_SHOW
object:nil];
}
- (void)stopTrackingHidePopover {
[[NSNotificationCenter defaultCenter] removeObserver:self
name:NOTIFICATION_POPOVER_HIDE
object:nil];
[[NSNotificationCenter defaultCenter] removeObserver:self
name:NOTIFICATION_POPOVER_SHOW
object:nil];
}
- (void)presentPopover:(UIPopoverController *)popover fromRect:(CGRect)rect permittedArrowDirections:(UIPopoverArrowDirection)arrowDirections animated:(BOOL)animated {
self.hiddenPopoverController = popover;
self.hiddenPopoverPresentingRect = rect;
self.hiddenPopoverPresentingButton = nil;
self.hiddenPopoverArrowDirection = arrowDirections;
self.hiddenPopoverAnimated = animated;
if ([popover delegate]) {
self.hiddenPopoverDelegate = [popover delegate];
}
[popover presentPopoverFromRect:rect inView:[self view] permittedArrowDirections:arrowDirections animated:animated];
}
- (void)presentPopover:(UIPopoverController *)popover fromBarButtonItem:(UIBarButtonItem *)button permittedArrowDirections:(UIPopoverArrowDirection)arrowDirections animated:(BOOL)animated {
self.hiddenPopoverController = popover;
self.hiddenPopoverPresentingButton = button;
self.hiddenPopoverArrowDirection = arrowDirections;
self.hiddenPopoverAnimated = animated;
[popover presentPopoverFromBarButtonItem:button permittedArrowDirections:arrowDirections animated:animated];
}
- (void)dismissedPopover {
// Don't destroy any data if we are in the middle of the hiding process
if (self.hiddenPopoverHidingInProgress) {
return;
}
self.hiddenPopoverDelegate = nil;
self.hiddenPopoverContent = nil;
self.hiddenPopoverController = nil;
self.hiddenPopoverPresentingButton = nil;
}
#pragma mark - Popover notifications
// Temporarily hide a popover
- (void)hidePopover:(NSNotification *)notification {
self.hiddenPopoverContent = nil;
if (self.hiddenPopoverController) {
// Save some details of the current state
// Holding on to the content view means we can go back to the same state
self.hiddenPopoverContent = [self.hiddenPopoverController contentViewController];
self.hiddenPopoverContentSize = [self.hiddenPopoverController popoverContentSize];
id <UIPopoverControllerDelegate> popoverDelegate = [self.hiddenPopoverController delegate];
self.hiddenPopoverDelegate = popoverDelegate;
[self.hiddenPopoverController dismissPopoverAnimated:YES];
self.hiddenPopoverHidingInProgress = YES;
if (popoverDelegate) {
[popoverDelegate popoverControllerDidDismissPopover:self.hiddenPopoverController];
}
self.hiddenPopoverHidingInProgress = NO;
self.hiddenPopoverController = nil;
}
}
// Show a popover that had previously been hidden
- (void)showPopover:(NSNotification *)notification {
if (self.hiddenPopoverContent) {
UIPopoverController *popover = [[UIPopoverController alloc] initWithContentViewController:self.hiddenPopoverContent];
if ([popover respondsToSelector:@selector(popoverBackgroundViewClass)]) {
[popover setPopoverBackgroundViewClass:[ZingPopoverBackgroundView class]];
}
CGSize popSize = self.hiddenPopoverContentSize;
[popover setPopoverContentSize:popSize animated:YES];
[popover setDelegate:self.hiddenPopoverDelegate];
if (self.hiddenPopoverPresentingButton) {
[popover presentPopoverFromBarButtonItem:self.hiddenPopoverPresentingButton permittedArrowDirections:self.hiddenPopoverArrowDirection animated:self.hiddenPopoverAnimated];
} else {
[popover presentPopoverFromRect:self.hiddenPopoverPresentingRect inView:[self view] permittedArrowDirections:self.hiddenPopoverArrowDirection animated:self.hiddenPopoverAnimated];
}
self.hiddenPopoverController = popover;
}
}
@end
view raw gistfile1.m hosted with ❤ by GitHub

To use it, a view controller should call startTrackingHidePopover and use either of the presentPopover: replacements to initially show a popover. When the popover is finally dismissed, call dismissedPopover, and stopTrackingHidePopover when you leave the view.

  • Part 1: Dynamically injecting video into a UIWebView
  • Part 2: Detecting scrolling to the end of a UIWebView page
  • Part 3: Handling full screen video

iOS6 and Rotation Whack-a-Mole

Recently I started a new iOS app primarily to research a few user interaction effects, but it may turn into a real-life app. As a universal app the iPad naturally support all rotations, but on the iPhone I wanted both portrait and landscape views despite the large difference in aspect ratio.

Apple introduced a new way of handling rotation in iOS6, which the documentation covers pretty well. In the long term it should make things simpler, but in the short term developers will need to support the iOS5 way by responding to the shouldAutorotateToInterfaceOrientation: method, and the iOS6 way by coordinating the Info.plist rotation settings, the application delegate’s application:supportedInterfaceOrientationsForWindow: and a view controller’s supportedInterfaceOrientations methods. The easiest way to handle the latter is to create a category for UIViewController:

@implementation UIViewController (Rotation)
// iOS 6
- (BOOL)shouldAutorotate {
return YES;
}
- (NSUInteger)supportedInterfaceOrientations {
return IPAD ? UIInterfaceOrientationMaskAll : UIInterfaceOrientationMaskAllButUpsideDown;
}
@end
view raw gistfile1.m hosted with ❤ by GitHub

These methods indicate which rotations are valid for all views, and indeed work very nicely when you rotate the device. But, and the whole point of this blog post is built around the but, there are a few issues to overcome with iOS6.

Select Meal TypeIn one area of the app, I wanted to present a small modal dialog on top of the current view to allow the user to select an item from a list. A semi-transparent shade layer appears underneath the modal to trap any taps on the screen (taps on this layer cancels the modal much like a UIPopover) but still allow the user to see what is underneath, and the whole presentation is less glaring transition than the standard full screen change, which hides the current context.

The standard iOS way for a view controller to show a modal view is via presentViewController:animated:completion:. It is relatively easy to insert a semi-transparent view into the presented controller’s view hierarchy, add a gesture recognizer to collect the taps on that background and to show a pretty view on top. But, and here comes that but, when you rotate the device the modal view controller rotates very nicely just as it should, the presenting view controller, the one that is visible underneath your shade doesn’t budge. This because iOS on the iPhone presents modals as full screen and saves some work by not sending rotation events to the view controllers earlier in the stack.

This state of affairs caused much gnashing of teeth – the mismatched text orientation between the two levels looked ugly, but I really wanted the semi-transparent effect to reduce the weight of the user interface. I also wanted to retain the modal in its own view controller because I anticipated using the pattern in several places and I didn’t want to load up the main view controller with a bunch of extra views.

I tried many things, some of them fairly ugly hacks, but in the end there was effectively a single line of code solution.

iOS5 introduced the concept of custom container view controllers. There have always been container view controllers such as UINavigationController and UITabBarController in iOS, but now we can implement our own containers with our own logic for transitioning between views or indeed to present several views concurrently on a screen, each one managed by its own controller.

[self addChildViewController:modalViewController];
[[modalViewController view] setFrame:[[self view] bounds]];
[[self view] addSubview:[modalViewController view]];
[modalViewController didMoveToParentViewController:self];
view raw gistfile1.m hosted with ❤ by GitHub

The addChildViewController: call establishes the relationship between the container and modal, then we say whereabouts the child will appear on the screen so that the child’s view is part of the container’s view hierarchy. Custom containers must call didMoveToParentViewController: explicitly to tell the child that the transition is complete. The child container can override this method to react to its state change. When you are ready to delete the child view there is a removeChildViewContainer: method. Containers will automatically forward rotation events to their child controllers if the shouldAutomaticallyForwardRotationMethods returns YES, which happens to be the default.

Bonus tip: setting the modal’s frame before displaying it is important because it avoids any problems with positioning views during rotation. I didn’t do this in my initial implementation and saw some rather bizarre locations of views after rotation.

So there we are, I have the appearance of a modal laid on top of a view, everything visible rotates perfectly, and the main view and modal views have their own controllers for good code separation.

App Tour : Part 3 – Handling full screen video

This is the third of a four part series. The first part discussed dynamically injecting video into a UIWebView and followed on in the second part with how to detect scrolling to the end of the HTML page.

Back in the first part of this series, I discussed how to dynamically insert a video into a HTML page hosted in a UIWebView control. By utilizing HTML5 video tags, we can offload the actual playback to the UIWebView control, with it providing all of the playback controls and chrome. On an iPhone any HTML5 video will automatically play in full screen, which is just perfect – we are showing video of using the iPhone version of the app, so showing it full screen is exactly what we want.

But on an iPad, the video is constrained by the size of the UIWebView. In my app, the iPad version of the tour is presented in a popover so the video is only 320px wide. Part of the video player chrome includes a full screen button, which does indeed expand the video to full screen, obscuring everything in the main view hierarchy, however the popover remains visible on top of the video because it is not part of the standard view hierarchy. This is definitely not what we want. So our next challenge in the app tour is how to hide the popover while a video is playing full screen and restore that popover when the video is done.

The video playback is actually controlled by the UIWebView object and not a MPMoviePlayerController. This means that you cannot observe any of the standard MPMoviePlayer* movie player notifications (well you can observe them, you just won’t receive any notifications!). However, when the UIWebView control plays video, it generates equivalent UIMoviePlayerController* notifications, and so there are UIMoviePlayerControllerDidEnterFullscreenNotification and UIMoviePlayerControllerDidExitFullscreenNotification (note the lowercase ‘s’ in screen) notifications that we can observe and receive notifications for.

In the tour view controller that is being presented in the popover, I can be told when the user decides to go full screen and react accordingly:

[[NSNotificationCenter defaultCenter] addObserver:self selector:@selector(videoEnterFullScreen:) name:@"UIMoviePlayerControllerDidEnterFullscreenNotification" object:nil];
[[NSNotificationCenter defaultCenter] addObserver:self selector:@selector(videoExitFullScreen:) name:@"UIMoviePlayerControllerDidExitFullscreenNotification" object:nil];

Once I receive the notifications, I need to pass on that fact to the view controller that initially presented the popover so that it can dismiss or re-present the popover. I do that through another set of application specific notifications. I use two sets of notifications because the decision to hide/show a popover might come from more scenarios than just full screen video playback. The tour view controller knows it is going to be showing video, so that is what it looks for. But the main view controller has no idea what is going on in the popover’s content, so it just looks for generic instructions to show and hide the popover.

- (void)videoEnterFullScreen:(NSNotification *)notification {
// Need to inform whoever is listening to hide my popover
[[NSNotificationCenter defaultCenter] postNotificationName:NOTIFICATION_POPOVER_HIDE object:nil];
}
- (void)videoExitFullScreen:(NSNotification *)notification {
// Need to inform whoever is listening to show my popover
[[NSNotificationCenter defaultCenter] postNotificationName:NOTIFICATION_POPOVER_SHOW object:nil];
}
view raw gistfile1.m hosted with ❤ by GitHub

Once the main view controller receives the NOTIFICATION_POPOVER_HIDE notification, then it can dismiss the popover via something like [self._myPopover dismissPopoverAnimated:YES] and the video can play full screen unencumbered by any overlays.

The next challenge comes about when the video is finished and the video exits full screen. Again, the main view controller receives a notification to show the popover again, which it can do easily, but I would really like to return to the same state that the user last saw in the popover. That is, I want to return to a view potentially several layers deep in a view hierarchy. I can do that if I retain a reference to the content view before dismissing the popover, and using that reference when I present the popover again.

// Temporarily hide a popover
- (void)hidePopover:(NSNotification *)notification {
self.hiddenPopoverContent = nil;
if (self.hiddenPopoverController) {
// Save some details of the current state
// Holding on to the content view means we can go back to the same state
self.hiddenPopoverContent = [self.hiddenPopoverController contentViewController];
self.hiddenPopoverContentSize = [self.hiddenPopoverController popoverContentSize];
id <UIPopoverControllerDelegate> popoverDelegate = [self.hiddenPopoverController delegate];
self.hiddenPopoverDelegate = popoverDelegate;
[self.hiddenPopoverController dismissPopoverAnimated:YES];
self.hiddenPopoverHidingInProgress = YES;
if (popoverDelegate) {
[popoverDelegate popoverControllerDidDismissPopover:self.hiddenPopoverController];
}
self.hiddenPopoverHidingInProgress = NO;
self.hiddenPopoverController = nil;
}
}
// Show a popover that had previously been hidden
- (void)showPopover:(NSNotification *)notification {
if (self.hiddenPopoverContent) {
UIPopoverController *popover = [[UIPopoverController alloc] initWithContentViewController:self.hiddenPopoverContent];
if ([popover respondsToSelector:@selector(popoverBackgroundViewClass)]) {
[popover setPopoverBackgroundViewClass:[ZingPopoverBackgroundView class]];
}
CGSize popSize = self.hiddenPopoverContentSize;
[popover setPopoverContentSize:popSize animated:YES];
[popover setDelegate:self.hiddenPopoverDelegate];
if (self.hiddenPopoverPresentingButton) {
[popover presentPopoverFromBarButtonItem:self.hiddenPopoverPresentingButton permittedArrowDirections:self.hiddenPopoverArrowDirection animated:self.hiddenPopoverAnimated];
} else {
[popover presentPopoverFromRect:self.hiddenPopoverPresentingRect inView:[self view] permittedArrowDirections:self.hiddenPopoverArrowDirection animated:self.hiddenPopoverAnimated];
}
self.hiddenPopoverController = popover;
}
}
view raw gistfile1.m hosted with ❤ by GitHub

The hidePopover: method is called as a result of receiving NOTIFICATION_POPOVER_HIDE, it retains some useful information about the popover before dismissing it. The showPopover: method uses those retained values and a couple of others that were saved when the popover was initially presented, to show the popover again. Because the popover’s content view was retained, it’s state has been preserved and the user sees the exact same view from before the video playback.

I actually implemented the hidePopover: and showPopover: in a category on UIViewController, but the details of that implementation will be the subject of the fourth part of this series.

  • Part 1: Dynamically injecting video into a UIWebView
  • Part 2: Detecting scrolling to the end of a UIWebView page
  • Part 4: Mimicking instance variables for a category

App Tour – Part 2: Detecting scrolling to the end of a UIWebView page

This is the second of a four part series. The first part discussed dynamically injecting video into a UIWebView.

In the latest version of Taste ZiNG! are a set of pages that offer a tour on the concepts behind ZiNG! and on how to use the app. As an encouragement for reading these pages, I offer a reward in the form of publishing credits1. If you complete a section of the tour, then you receive a free credit.

The tour content is implemented as a set of HTML pages hosted inside a UIWebView control. To earn the credit I wanted the user to actually read the content, so just bringing up the page was not enough, I really wanted to know if they read to the bottom. Now obviously I have no way of knowing if they actually did read (all developers know, to our endless frustration, that users don’t read!), but I could at least hold off on granting the credit until they scrolled to the bottom of the page. I did consider adding a time component to that, but decided that was a bit too much. Maybe next time.

So the problem in hand is how do we know when the user has scrolled to the bottom on a HTML page in a UIWebView control?

Detecting scrolling in HTML is fairly straightforward JavaScript included into each page:

document.addEventListener("DOMContentLoaded",
window.addEventListener("scroll",
function() {
var b = document.body
if (b.clientHeight + b.scrollTop >= b.scrollHeight) {
// ...
}
})
if (b.clientHeight >= b.scrollHeight) {
// ...
}
})
view raw gistfile1.js hosted with ❤ by GitHub

When the document is loaded, set up an event listener for the scroll event, and if the height of the body plus the scrolled offset point is greater or equal than the entire height of the scrollable area, then we’ve reached the bottom. The extra test outside of adding the event listener is to handle cases when the HTML page fits onto a single screen and there is unlikely to be any scrolling.

When we detect the user has reached the bottom of the page, we want to communicate that back to our Objective-C code. The way to do that is to use -webView:shouldStartLoadWithRequest:navigationType: method on the UIWebView delegate. This method is invoked whenever the HTML document is about to navigate to another link, giving a delegate a chance to respond with a YES or a NO. If the method returns a YES the navigation proceeds, but if the response is a NO then the HTML page is not changed.

Initiating navigation in JavaScript is simply a case of setting the window’s location to a new URL. But one of the things we can do is invent our own scheme to differentiate our actions from standard http: links.

if (b.clientHeight + b.scrollTop >= b.scrollHeight) {
    window.location.href='rb://scrolled.bottom'
}

The rb://scrolled.bottom URL is completely made up, it just serves as a signal for our code to perform a specific action.

- (BOOL)webView:(UIWebView *)webView shouldStartLoadWithRequest:(NSURLRequest *)request navigationType:(UIWebViewNavigationType)navigationType {
NSString *scheme = [[[request URL] scheme] lowercaseString];
// Allow standard URLs through
NSSet *stdSchemes = [NSSet setWithObjects:@"http", @"file", nil];
if ([stdSchemes containsObject:scheme]) {
return YES;
}
// We do something with the special RB scheme
if ([scheme isEqualToString:@"rb"]) {
if (!delegate) {
return NO;
}
NSString *event = [[[request URL] host] lowercaseString];
if ([event isEqualToString:@"scrolled.bottom"]) {
if ([delegate respondsToSelector:@selector(webPageScrolledToBottom:)]) {
dispatch_async(dispatch_get_global_queue(DISPATCH_QUEUE_PRIORITY_DEFAULT, 0), ^(void){
[delegate webPageScrolledToBottom:_fileName];
});
}
}
}
return NO;
}
view raw gistfile1.m hosted with ❤ by GitHub

In the shouldStartLoadWithRequest method, we allow the standard http and file requests through by returning YES. (The file: requests need to be handled because the HTML pages link to stylesheet and javascript files in the app bundle). But if we see the rb: scheme then we need to decode the rest of the URL to determine what particular action to perform, in this case that we’ve scrolled to the bottom of the page.

One thing that we need to be careful with is that the shouldStartLoadWithRequest method should return quickly, not only from a user experience point of view but also because the UIWebView control only waits 10 seconds for a response before it gives up and continues. Therefore as soon as we determine a delegate is interesting in knowing that we’ve scrolled to the bottom then we use Grand Central Dispatch to push the invocation on to an asynchronous queue and inform the UIWebView to stop loading.

With an event listener, the UIWebView signals a scroll to the bottom by initiating a navigation, that navigation is intercepted and refused, but not before signaling back up the view hierarchy. In this specific instance of the tour, I ultimately record the scroll event in a NSUserDefaults item, but the aspects of that little detail are not relevant to this post.

  • Part 1: Dynamically injecting video into a UIWebView
  • Part 3: Handling full screen video
  • Part 4: Mimicking instance variables for a category
  1. In Taste ZiNG! you can publish your wine and food information to the cloud, the monthly cost for that publishing is handled through an in-app currency called credits.

App Tour – Part 1: Dynamically injecting video into a UIWebView

I didn’t intend to kick off this blog with a hefty four part series on a deep iOS topic, but it is fresh in my mind and in the recent implementation of this functionality I encountered several interesting topics that are not well covered elsewhere on the web.

The headline feature in the latest version of my app1 is a tour – a set of pages that describe the underlying concepts of ZiNG! and how to use the app. These pages are a set of HTML documents presented in a UIWebView, and for the actual help I decided to supplement those pages with screencasts. I use videos on an external support center site so it was nice to get double duty out of them.

Incidentally, I create the videos with the Reflection app that uses AirPlay to mirror a device’s screen to a desktop. The app has a built in recorder to capture whatever you do on the device.

Taste ZiNG! is a universal app with slightly different UIs on the iPhone and iPad, which means that any screencasts will vary from device to device. I did not want to embed the videos in the app because that would have bloated the download significantly and I wanted the capability to modify the videos. That meant that I needed, at run-time, to dynamically determine which video to show in which situation, based on device, app version and tour page, and to splice that specific video into the HTML.

Therefore each HTML document contains just the basic text and I inject the appropriate video tags when the page loads. The HTML documents are shipped with the app so that the tour still has content even if the user is offline.

For the first task of determining which video page to serve up, I use a class in Parse pre-populated with data about the video URLs from my video hosting service. Parse is literally a mobile developer’s best friend. I use it all the time to store data in the cloud, without the need to build out a server infrastructure, resulting in huge savings in time, effort and money. Using the Parse SDK to fetch data is super simple:

PFQuery *query = [PFQuery queryWithClassName:@"Videos"];
[query whereKey:@"videoId" equalTo:[NSNumber numberWithInteger:[[item objectForKey:@"videoID"] integerValue]]];
[query whereKey:@"model" equalTo:model];
[query whereKey:@"zingVersion" lessThanOrEqualTo:[NSNumber numberWithInteger:CURRENT_VERSION]];
[query orderByDescending:@"zingVersion"];
// Go get the name of the video
[query getFirstObjectInBackgroundWithBlock:^(PFObject *video, NSError *error) {
if (error) {
// ...
} else {
NSString *videoSource = [video objectForKey:@"videoURL"];
if ([videoSource length] > 0) {
NSString *thumbnail = [video objectForKey:@"thumbnailURL"];
NSString *script = [NSString stringWithFormat:@"createVideo('%@','%@')", thumbnail, videoSource];
// ...
}
}
}];
view raw gistfile1.m hosted with ❤ by GitHub

I instantiate a PFQuery class, set the retrieval parameters and fetch the data in a background thread. A successful result returns a PFObject, which is just a dictionary from which I can extract the columns I am interested in. I use that data to create a little snippet of Javascript, which is part of the second task of adding the video to the HTML document.

An Objective-C class can interact with a UIWebView through the -stringByEvaluatingJavaScriptFromString: method. I invoke this when the UIWebView’s delegate receives a webViewDidFinishLoad: request.

- (void)webViewDidFinishLoad:(UIWebView *)webView {
    if (onLoadScript) {
        [webView stringByEvaluatingJavaScriptFromString:onLoadScript];
    }
}

This script invokes a Javascript function with the video URL and poster thumbnail URL as parameters. The definition of that function is included into each of the tour’s HTML documents.

function createVideo( thumbnail, videoSource ) {
var root = document.body
var vid = document.createElement("video")
vid.setAttribute("controls","controls")
vid.setAttribute("poster",thumbnail)
var src = document.createElement("source")
src.setAttribute("src",videoSource)
src.setAttribute("type","video/mp4")
vid.appendChild(src)
root.appendChild(vid)
}
view raw gistfile1.js hosted with ❤ by GitHub

The UIWebView control supports HTML5’s video tag and because this is an iOS device I only need to be concerned with MP4 video.

So now I can dynamically determine which video to show for a particular tour topic, inject that video URL into a HTML document and let iOS handle the video playback.

  • Part 2: Detecting scrolling to the end of a UIWebView page
  • Part 3: Handling full screen video
  • Part 4: Mimicking instance variables for a category
  1. Taste ZiNG! v1.3, available Nov 5, 2012